Capturing an image can be extraordinary, especially when your subject is a model. I’m going to go over with you how I create nice silhouette pictures of models. I’m also going to tell you how I get stunning results in my photos. If you’re a model looking to add more creative images to your portfolio, take a look at why silhouettes are a neat addition and can add more depth to your style.
Where do you start?
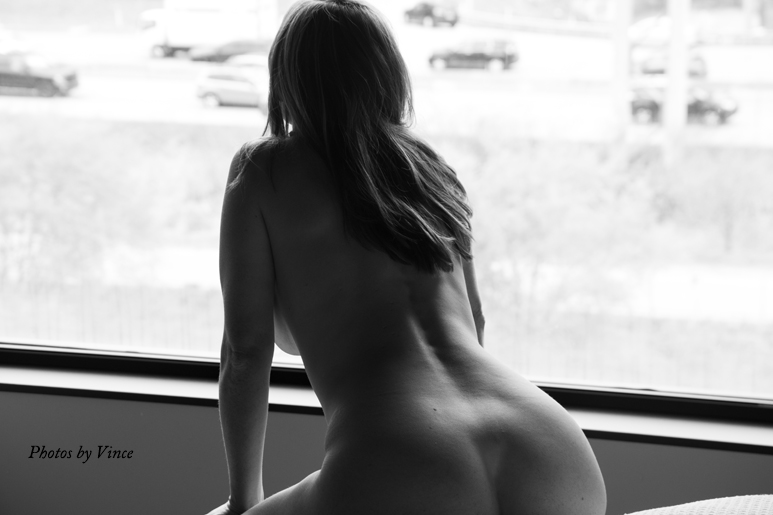
Since I mainly work with models, I will use a nude female model as an example. I think a nude model makes a better result for a silhouette because the images turn out more artistic. Below is my model Jessica Jones posing on the edge of the bed, observing the traffic on the Parkway East of Pittsburgh. The sun shining through the big window helped me capture this gorgeous picture of Jessica’s nude silhouette. You can make out her naked body but not entirely in detail.
A perfect light source has to be behind the subject to capture a lovely silhouette all the time. The idea is to create a shadow of the form you are photographing. Depending on the light source’s strength, the shadow will appear darker or lighter and cast a different effect every time. In the picture of Jessica, I had her facing the sun, which created an outline of her just enough to make out some detail. I snapped the shot from a diagonal angle, showing the front illumination and the rear to be darker. It’s all in the camera lens angle, making the silhouette more or less dramatic. You have to experiment to get what you like.
How do you do it ?
Now we get to how I make the picture and finally capture it on the camera. The only thing I need besides the light source is my light meter. I have two meters and mainly use my Sekonic Litemaster Pro L-478 D-U. The light meter is simply pointing to the light and getting the correct F stop reading that I want. Without the light meter, I would be just guessing, and the image results are inconsistent. If I’m shooting in a particular location outdoors or in a studio indoors to capture a pinpoint look, I always want to ensure the model’s results are consistent and look the same. Outdoor lighting constantly changes, so a meter is an essential tool to have. Indoor, the light meter sets my studio flash, and I have a permanent exposure until I decide to brighten or lessen the light.
Custom white balance
After I measure my light, the second step that I do is to set the camera’s custom white balance to the surroundings, including the model. For this step, I use the expo disc, which accurately assesses the colors of the surroundings, including the model’s skin tones. If I used the automatic white balance (AWB) setting in the camera, my results would be generic. For example, an image that looks brighter than the one taken before or after it in the exact location means the camera’s F stop does not match the light source setting an inaccurate image exposure.
Want a consistent silhouette?
If you’re a model starting out in the modeling industry or an experienced model who has been at it for a long time, you want to make sure that your pictures look the same in each set.